Danos Router Project
Installation (basierend auf Version 2005 von 2020)
You should have at least 8 GB HDD and 4 GB RAM https://danosproject.atlassian.net/wiki/spaces/DAN/pages/425995/Installing+DANOS
- Boot ISO
- install image
- run through setup - in doubt just enter
- reboot
Privileges
https://danosproject.atlassian.net/wiki/spaces/DAN/pages/1638401/Getting+Started
- Operator
- Admin
- Superuser
Configuration Mode symbols
https://danosproject.atlassian.net/wiki/spaces/DAN/pages/1638401/Getting+Started
- + Multinode
- > Non-leaf node
- +> Tag node (multiple non-leaf)
Configuration Basics
https://danosproject.atlassian.net/wiki/spaces/DAN/pages/1998899/Working+with+configuration
Nicht config mode
Show System Network Interfaces
operational mode
show interfaces system
show
show arp
show configuration
show configuration all
show configuration path system
show configuration path security
...
Zeit alle eigenen IP-Adressen an, egal auf welchem interface
show dataplane address
show firewall show users (logged in users)
config mode
set system host-name <<hostname>>
set system domain-name <<domain-name>>
Loopbackup Adresse setzen und hierauf auch den DNS Namen zeigen lassen
set system static-host-mapping host-name <<hostname>> inet 10.10.128.2
Optional ein Alias setzen:
set system static-host-mapping host-name <<hostname>> alias <<aliasname>>
Löschen könnte man dies mit
delete system static-host-mapping host-name <<hostname>> alias <<aliasname>>
Anlegen der Default Routen
set protocols static route 0.0.0.0/0 next-hop 10.10.128.1 set protocols static route6 ::/0 next-hop 2001:1234:1234:6000::53
Definition der DNS Nameserver
set system name-server 10.10.128.1 set system name-server 2001:1234:1234:6000::53
Sofern man NICHT den domain-name gesetzt hat, kann man den domain search path definieren
set system domain-search domain domain1.de set system domain-search domain domain2.com
Setzen der NTP Server
set system ntp server 2.de.pool.ntp.org set system ntp server 2.nl.pool.ntp.org set system time-zone Europe/Berlin
Einem Benutzer superuser Rechte geben
set system login user <<Benutzername>> level superuser
Repository Cache jeden x-ten Tag aktualisieren
set system package auto-sync x
SSH aktivieren
Interface configuration dhcp
configuration mode
edit interfaces dataplane dp0p8s0
set address dhcp
set ipv6 address autoconf
Interface configuration autoconf configuration mode
edit interfaces dataplane dp0p8s0
set ip disable-forwarding (no ideah why it needs to be deactivated though)
set ipv6 address autoconf
Interface configuration static
configuration mode
edit interfaces dataplane dp0p8s0
set address 2001:342:234::1/64
Firewall
- Verbindungen vom Danos ausgehend können nicht gefiltert werden.
- Regelnummer macht man üblicher Weise in 10er Schritten um später noch Platz dazwischen zu haben...
- Zuerst muss eine firewallregel mit einem bestimmten Namen angelegt werden:
edit security firewall name wantofirewall
set default-action drop
description "alle Pakete vom Internet auf diese Firewall"
edit rule 10
set action accept set description "allow IPv6 ssh from oldlan"
set protocol tcp set source address 2001:1234:1234:1b::/64
set destination port ssh
set destination addreess 2001:1234:1234:6000::64
commit
DHCP Server
https://docs.huihoo.com/vyatta/6.5/Vyatta-Services_6.5R1_v01.pdf
set service dhcp-server disabled false
set service dhcp-server listento interface dp0s19
set service dhcp-server shared-network-name LAN1 subnet 192.168.81.0/24 start 192.168.81.100 stop 192.168.81.150
set service dhcp-server shared-network-name LAN1 subnet 192.168.81.0/24 default-router 192.168.81.1
PPPoE
configuration mode
edit interfaces dataplane dp0p10s0
set resources chap-secrets user nc-username3@netcologne.de secret PASSWORT
set interfaces pppoe pppoe0 interface dp0p8s0
set interfaces pppoe pppoe0 chap-user "nc-username3@netcologne.de"
set interfaces pppoe pppoe0 default-route
set interfaces pppoe pppoe0 connect-on-demand
set interfaces pppoe pppoe0 name-server
set interfaces pppoe pppoe0 mtu 1492
Commit changes
configuration mode
commit
optional:
commit comment changedescription
Discard changes
discard
Proxmox Bereitstellung Danos
Voraussetzung ist eine vorhandene Proxmox Instanz bei dem das Danos Image schon bereitgestellt wurde (Link siehe # Links).
Create VM
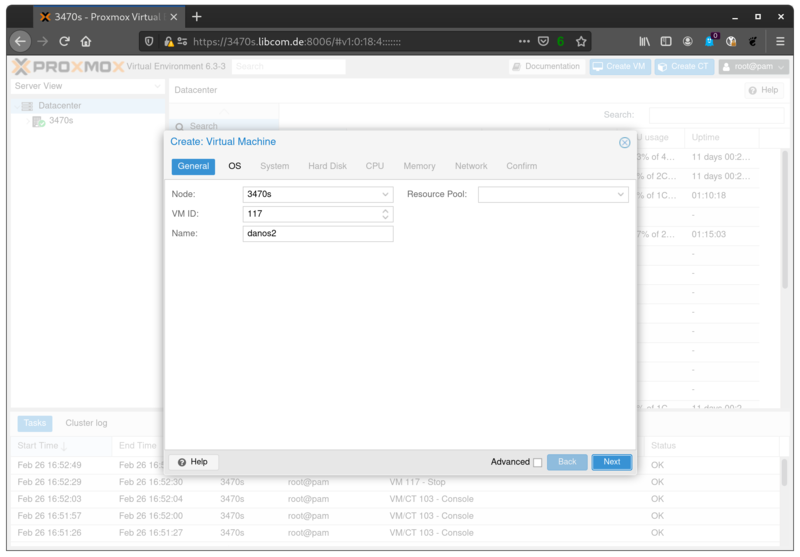
ISO zur Installation wählen

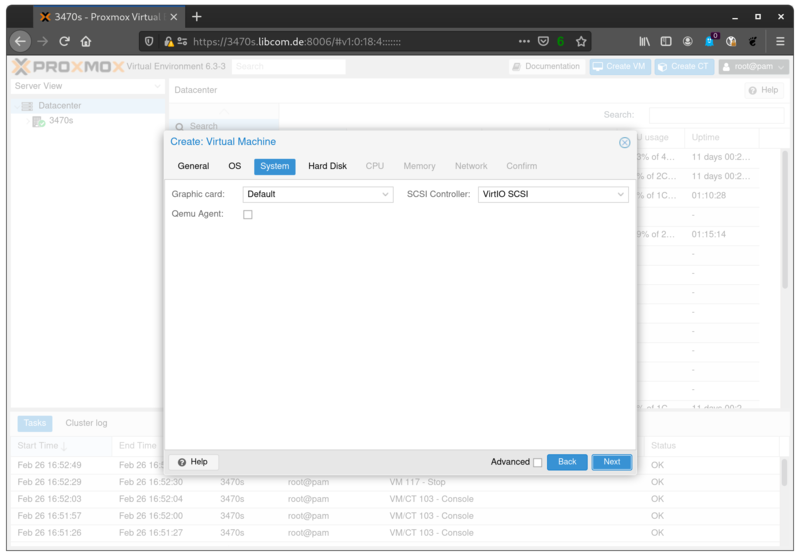
Controller
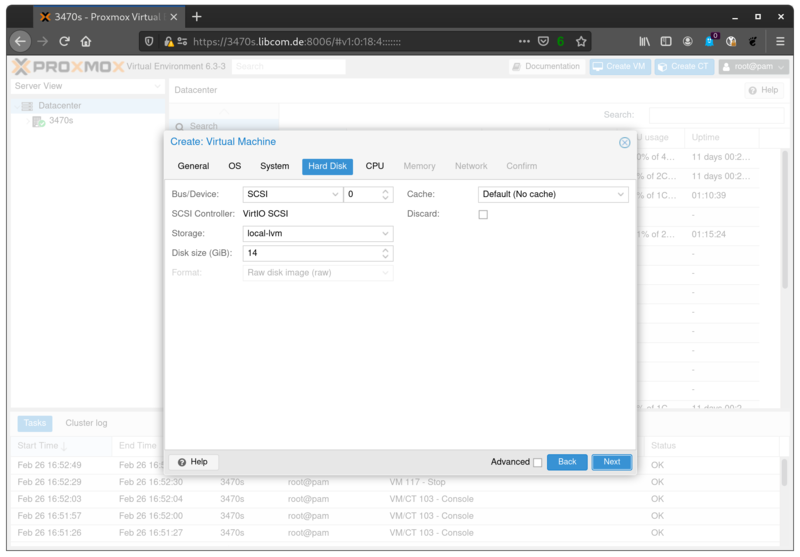
Storage
4 GiB genügen für eine Installation, empfohlen werden mindestens 8 GiB Festplattenspeicher
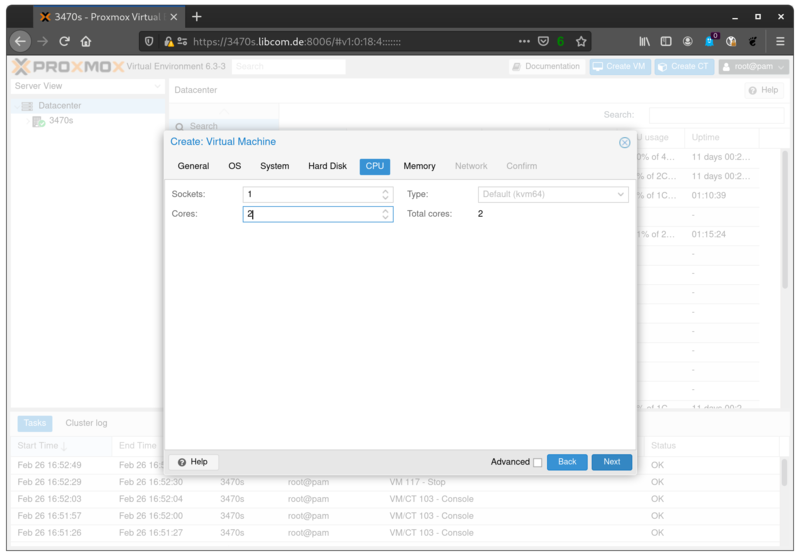
CPU Kerne
Für die Demo genügen 2 Kerne, empfohlen werden mindestens 4 Kerne. Maximal werden 128 Kerne unterstützt.
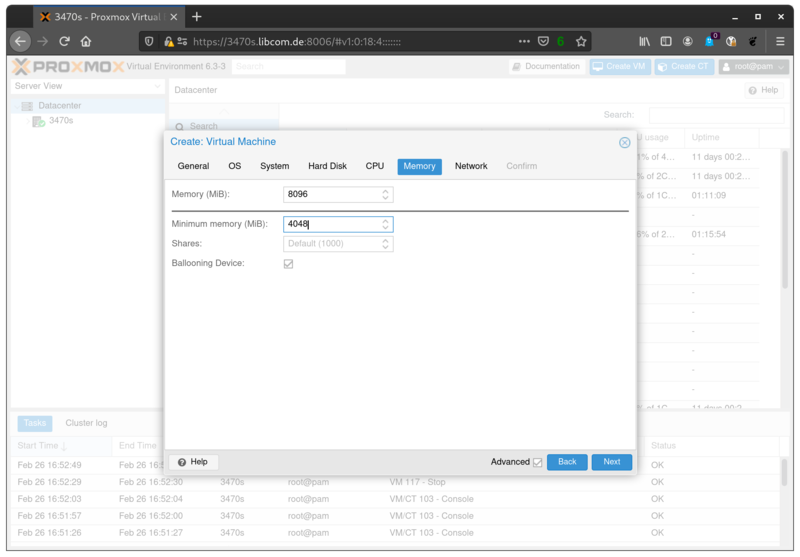
RAM
2 GB RAM ist Minimalanforderung, empfohlen werden 4 GB RAM oder mehr.
Upstream NIC
Der Wizard lässt einen erstmal nur eine Karte anlegen.

Bestätigen

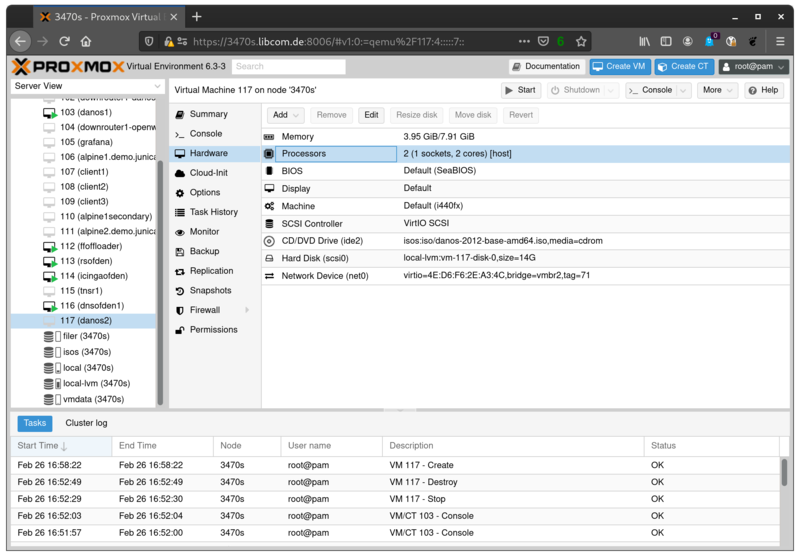
CPU flags
Bei mir war es nötig beim Prozessortyp die Option host zu setzen, da sonst die Dataplane nicht konfiguriert werden konnte.
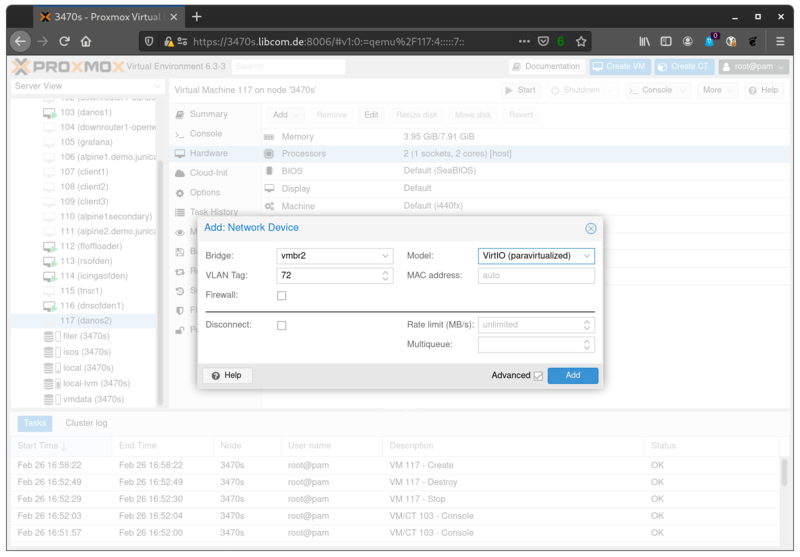
Downstream NIC
Weitere Netzwerkkarte für die Downstream Clients noch hinzufügen
Links
- Homepage: https://www.danosproject.org/
- Wiki: https://danosproject.atlassian.net/wiki/spaces/DAN/overview
- Bugtracker: https://danosproject.atlassian.net/jira/projects?selectedProjectType=service_desk
- Service Desk: https://danosproject.atlassian.net/servicedesk/customer/portals
- Aktuelles Release: https://danosproject.atlassian.net/wiki/spaces/DAN/pages/819201/Releases
- Download Release 2012: https://s3-us-west-1.amazonaws.com/2012.repos.danosproject.org/2012/iso/danos-2012-base-amd64.iso
- Release Notes Release 2012: https://danosproject.atlassian.net/wiki/spaces/DAN/pages/894894119/DANOS+2012+Release+Notes